
Choosing a car seat is one of the most important decisions you’ll make as a parent. It’s not just about comfort; it’s about protecting your child’s life in the event of a car accident. But with so many options on the market, different types, confusing installation instructions, and ever-changing safety guidelines, it’s easy to feel overwhelmed.
This ultimate guide breaks down everything you need to know about car seats, from understanding the different types and their safety features to mastering proper installation and knowing when it’s time to transition to the next stage. We’ll cover it all, so you can feel confident that you’re making the best choice for your child’s safety.


Understanding Car Seat Types
There are three main types of car seats, each designed for a specific age, weight, and height range:
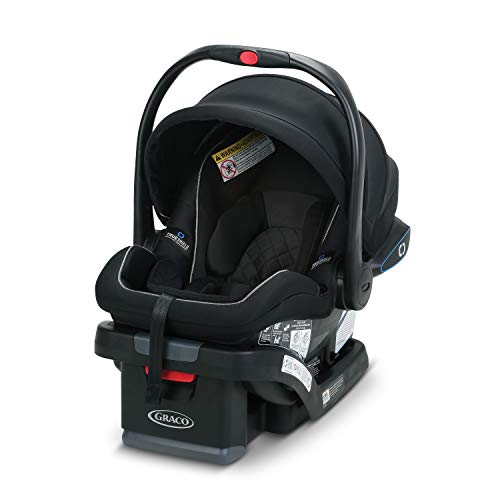
Infant Car Seats
- Designed for: Newborns and infants, typically up to 22-35 pounds and 29-35 inches in height (check your specific model’s limits).
- Key Features:
- Rear-facing only. This is the safest position for infants, as it protects their delicate head, neck, and spine.
- Portable carrier with a handle. This allows you to easily carry your baby in and out of the car without disturbing them.
- Often comes with a base that stays installed in the car. The carrier clicks into the base, making it convenient for quick trips.
- Typically have a 5-point harness (two shoulder straps, two hip straps, and a crotch strap).
- Pros: Portability, convenience, designed specifically for newborns.
- Cons: Shorter lifespan (your child will outgrow it relatively quickly).
Convertible Car Seats
- Designed for: A wider age and weight range, typically from birth up to 40-80 pounds and 40-57 inches in height (check your specific model’s limits).
- Key Features:
- Can be used rear-facing and forward-facing. This allows you to keep your child rear-facing for longer, which is recommended by safety experts.
- Larger and heavier than infant car seats, and typically stay installed in the car.
- Usually have a 5-point harness.
- Often have higher weight and height limits than infant seats.
- Pros: Longer lifespan, can be used rear-facing for longer, often more comfortable for older babies and toddlers.
- Cons: Less portable than infant seats, can be more expensive.
Booster Seats
- Designed for: Older children who have outgrown their forward-facing car seats, typically from around 40 pounds up to 80-120 pounds and 4’9″ to 5’3″ in height (check your specific model’s limits and your state’s laws).
- Key Features:
- Use the car’s seat belt to restrain the child.
- Position the seat belt correctly across the child’s body (lap belt low on the hips, shoulder belt across the chest and collarbone).
- Two main types: high-back boosters (provide head and neck support) and backless boosters (for children who have good head control).
- Pros: Help position the seat belt correctly, less expensive than car seats.
- Cons: Don’t offer the same level of protection as a car seat with a harness, require the child to sit properly.
Car Seat Safety Features: What to Look For
Beyond the basic types, several key safety features can significantly impact a car seat’s performance in a crash.
Side-Impact Protection
Look for car seats with deep side wings and energy-absorbing foam. These features help protect your child’s head, neck, and torso in a side-impact collision. Some seats even have additional side-impact protection pods or cushions.
5-Point Harness
A 5-point harness is the gold standard for car seat safety. It distributes crash forces across the strongest parts of the child’s body (shoulders and hips) and keeps them securely positioned in the seat.
Steel Reinforced Frame
A steel-reinforced frame provides added strength and durability to the car seat, helping it withstand crash forces.
Energy-Absorbing Foam
This type of foam (often EPS or EPP foam) helps absorb and dissipate crash energy, reducing the impact on your child’s body.
LATCH System (Lower Anchors and Tethers for Children)
LATCH is a system that makes it easier to install car seats correctly. It uses lower anchors (metal bars) built into the vehicle’s seat and a top tether strap to secure the car seat. While not inherently safer than a seatbelt installation if done correctly, LATCH often reduces the chance of user error.
Anti-Rebound Bar (for Rear-Facing Seats)
This feature, found on some rear-facing car seats, helps prevent the car seat from rotating excessively in a crash, reducing the risk of head and neck injuries.
Easy-to-Read Indicators
Look for car seats with clear, easy-to-read indicators that show when the seat is installed correctly (level indicators, belt path guides, etc.).
Proper Car Seat Installation: A Step-by-Step Guide
Correct installation is crucial for car seat safety. A car seat that isn’t installed properly won’t protect your child as well as it should. Always read your car seat’s manual and your vehicle’s owner’s manual thoroughly before installing.
General Installation Steps (Rear-Facing)
- Choose the Right Location: The safest place for a rear-facing car seat is in the center of the back seat, if you can get a tight installation there. If not, an outboard (window) seat is acceptable. Never install a rear-facing car seat in the front seat with an active airbag.
- Recline Angle: Ensure the car seat is reclined at the correct angle for your child’s age and weight. Most infant seats have a built-in recline indicator. Convertible seats often have multiple recline positions.
- LATCH or Seat Belt: Decide whether you’ll use the LATCH system or the vehicle’s seat belt. Do not use both. If using LATCH, attach the lower anchor connectors to the vehicle’s lower anchors and tighten the straps. If using the seat belt, thread the belt through the correct belt path (usually marked on the car seat) and buckle it.
- Tighten: Pull the LATCH straps or the seat belt very tight. You should not be able to move the car seat more than one inch in any direction at the belt path. Put your weight into it – kneel in the car seat while tightening.
- Top Tether (for Forward-Facing): If installing a forward-facing car seat, attach the top tether strap to the vehicle’s tether anchor and tighten it.
- Check for Tightness: Again, check that the car seat doesn’t move more than one inch in any direction at the belt path.
- Harness Adjustment (for Car Seats with a Harness):
- Make sure the harness straps are at or below your child’s shoulders for rear-facing, and at or above for forward-facing.
- The harness should be snug, with no slack. You should not be able to pinch any of the harness webbing between your fingers.
- The chest clip should be positioned at armpit level.
General Installation steps (Booster Seat)
- Position: Place the booster seat in the back seat.
- Seatbelt: Have the child sit in the booster and buckle the vehicle’s lap and shoulder belt.
- Fit: Ensure the lap belt sits low and snug across the child’s upper thighs/hips, not on the stomach. The shoulder belt should cross the middle of the chest and collarbone, not on the neck or face.
- Highback vs Backless: If using a high-back booster, make sure the headrest is adjusted to provide proper head support.
Getting Help with Installation
If you’re unsure about installing your car seat correctly, get help from a certified Child Passenger Safety Technician (CPST). Many fire departments, hospitals, and police stations offer free car seat checks. You can also find a CPST near you through the National Highway Traffic Safety Administration (NHTSA) website.
When to Transition to the Next Car Seat Stage
Knowing when to switch your child to the next car seat stage is just as important as choosing the right seat in the first place.
From Infant Seat to Convertible Seat
- Max Out Limits: Transition when your child reaches the maximum weight or height limit of their infant seat, whichever comes first.
- Head Room: If your child’s head is within one inch of the top of the infant seat’s shell, it’s time to switch.
From Rear-Facing to Forward-Facing
- Keep Rear-Facing Longer: The American Academy of Pediatrics (AAP) recommends keeping children rear-facing for as long as possible, ideally until they reach the maximum weight or height limit of their convertible car seat. This is the safest position for young children.
- Minimum Requirements: Never turn a child forward-facing before they are at least 2 years old and meet the minimum weight and height requirements of their convertible car seat.
From Forward-Facing Car Seat to Booster Seat
- Max Out Limits: Transition when your child reaches the maximum weight or height limit of their forward-facing car seat, whichever comes first.
- Maturity: Ensure your child is mature enough to sit properly in a booster seat for the entire ride, without slouching or playing with the seat belt.
- 5-Step Test: The child should be able to pass the 5-step test:
- Sits all the way back against the vehicle seat.
- Knees bend comfortably at the edge of the vehicle seat.
- Lap belt fits low and snug across the upper thighs/hips.
- Shoulder belt crosses the middle of the chest and collarbone.
- Can stay seated like this for the entire ride.
From Booster Seat to Seat Belt Alone
- State Laws: Follow your state’s laws regarding booster seat use.
- Height: Most children need a booster seat until they are at least 4’9″ tall (57 inches).
- Seat Belt Fit: The seat belt should fit properly without a booster: lap belt low on the hips, shoulder belt across the chest and collarbone.
Common Car Seat Mistakes to Avoid
Even with the best intentions, it’s easy to make mistakes with car seats. Here are some of the most common errors:
- Loose Installation: The car seat shouldn’t move more than one inch in any direction at the belt path.
- Incorrect Harness Straps: Harness straps should be at or below the shoulders for rear-facing, and at or above for forward-facing.
- Loose Harness: The harness should be snug, with no slack.
- Chest Clip Too Low: The chest clip should be at armpit level.
- Twisted Harness Straps: Twisted straps can reduce their effectiveness.
- Using Both LATCH and Seat Belt: Use one or the other, not both.
- Turning Forward-Facing Too Soon: Keep your child rear-facing for as long as possible.
- Using a Used Car Seat Without Knowing Its History: Avoid used car seats unless you know their full history and are certain they haven’t been in a crash.
- Not Reading the Manuals: Always read both the car seat manual and your vehicle’s owner’s manual.
- Adding Aftermarket Products: Don’t add anything to the car seat that didn’t come with it (e.g., extra padding, toys).
- Letting children wear bulky coats in their car seat. This creates slack in the harness.
Conclusion: Your Child’s Safety is Worth It
Choosing and using a car seat correctly can feel overwhelming, but it’s one of the most important things you can do to protect your child. Take your time, do your research, and don’t hesitate to ask for help from a CPST. By following these guidelines, you can ensure that your child is as safe as possible on every car ride. Remember, your child’s safety is worth the effort!
I’m Cris Coelho, and motherhood has transformed my life!
As a speech therapist and early childhood educator, I’ve always been passionate about child development. But it was becoming a mother that truly opened my eyes to the real challenges and joys of this journey.
Here at Materníssima, I share everything I’ve learned — blending professional knowledge, real-life experience, and a heartfelt touch.
You’re very welcome here! 💕